Translating sound into light
Ultrasound images are formed by detecting the amplitude of waves that are reflected back to the transducer as the transmitted waves travel through different tissues. Distances are judged by the time it takes for the waves to return to the probe.
Sound waves pass freely through fluid and very few are reflected back to the transducer—thus fluid appears black on the screen. As waves travel through tissues that offer some resistance such as solid organs, the energy of these waves is reduced or attenuated. A small amount of this energy is lost to heat, while the rest is reflected back to the transducer and displayed on the image as brightness. The denser a tissue the more waves are reflected back to the probe and the brighter the image appears on the screen.
Overall, the brightness of images on the screen corresponds to the intensity of the waves that are reflected back to the probe as they encounter different tissues. When describing ultrasound images and the varying shades of black, grey and white we use the terms anechoic, hypoechoic, isoechoic and hyperechoic (figure 2)
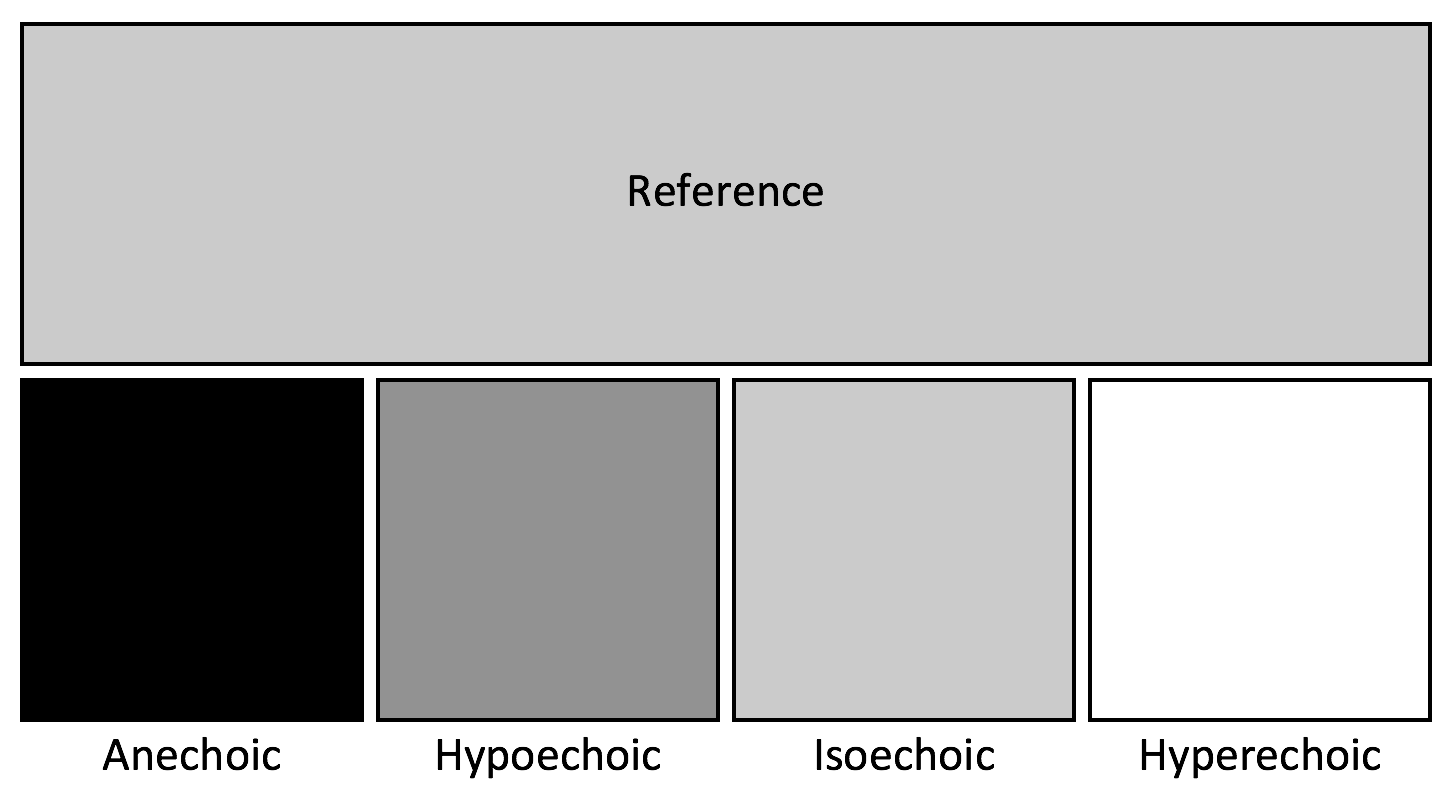 Figure 2: Describing ultrasound images
Anechoic: when no or minimal waves are reflected back to the probe, the area appears as black
Hypoechoic: when there is less intense return of waves compared to other structures, thus appearing darker than surrounding tissue
Isoechoic: when there is a similar intensity of returning waves compared to surrounding structures, thus appearing a similar shade to surrounding tissue
Hyperechoic: when there is a more intense reflection of ultrasound waves compared to surrounding structures, appearing as brighter than surrounding tissue
Generally speaking fluid transmits US waves freely and therefore appears as black or anechoic areas. Tissues with a high-water content or low density such as muscle or fat appear as darker in comparison to solid organs such as the liver. Finally, dense structures such as bone completely reflect ultrasound waves and appear as very bright, hyperechoic structures compared to surrounding tissues.
In addition to varying degrees of reflection and brightness there are several visual artifacts that result from the interaction between waves and various tissues. These are important to understand as they can help identify key structures as well as avoid mistaking them for pathological areas. Common artefacts include:
Shadowing occurs deep to hyperechoic structures that strongly reflect ultrasound waves such as bones. The image that results is a brightly hyperechoic structure with an anechoic/hypoechoic tail in the far-field as ultrasound waves are blocked from the deep structures (Figure 3). Acoustic shadowing can be used to help identify the ribs and pleural line in lung imaging or looking for calcified structures such as stones.
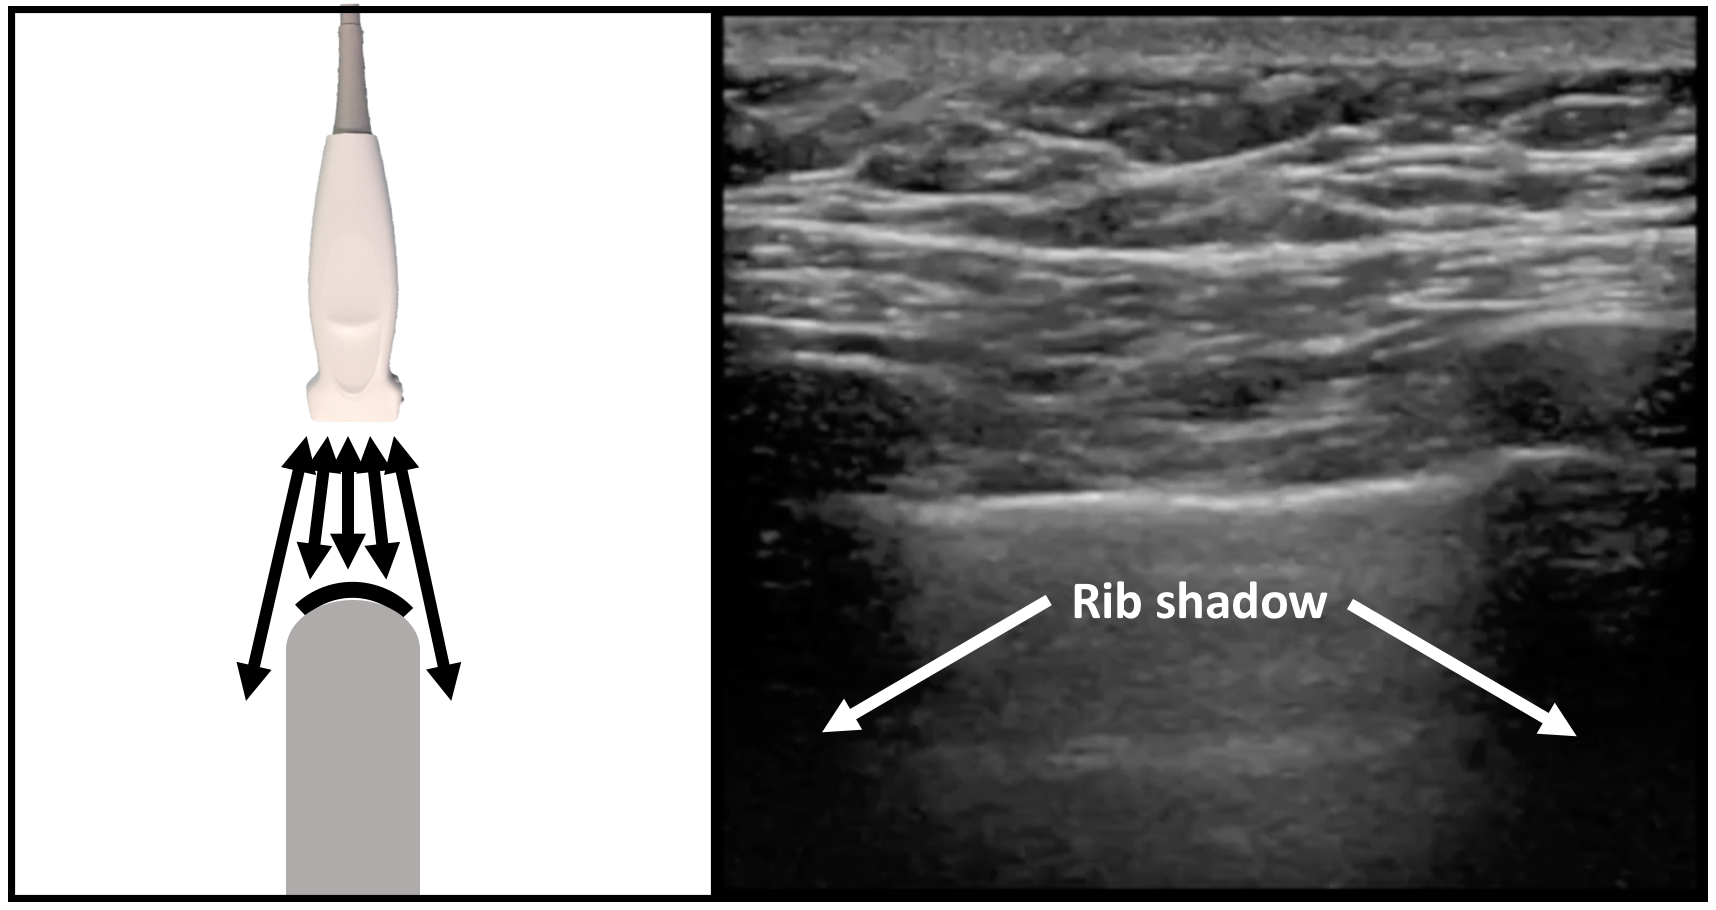 Figure 3: Shadowing artifact
Reverberation occurs when ultrasound waves reflect between two surfaces in parallel resulting in recurrent, regularly spaced bright arcs on the screen (Figure 4). This is commonly seen in normal lung as waves bounce back and forth between the reflective pleural line and the ultrasound probe, these regularly spaced repeated reflections are known as A-lines.
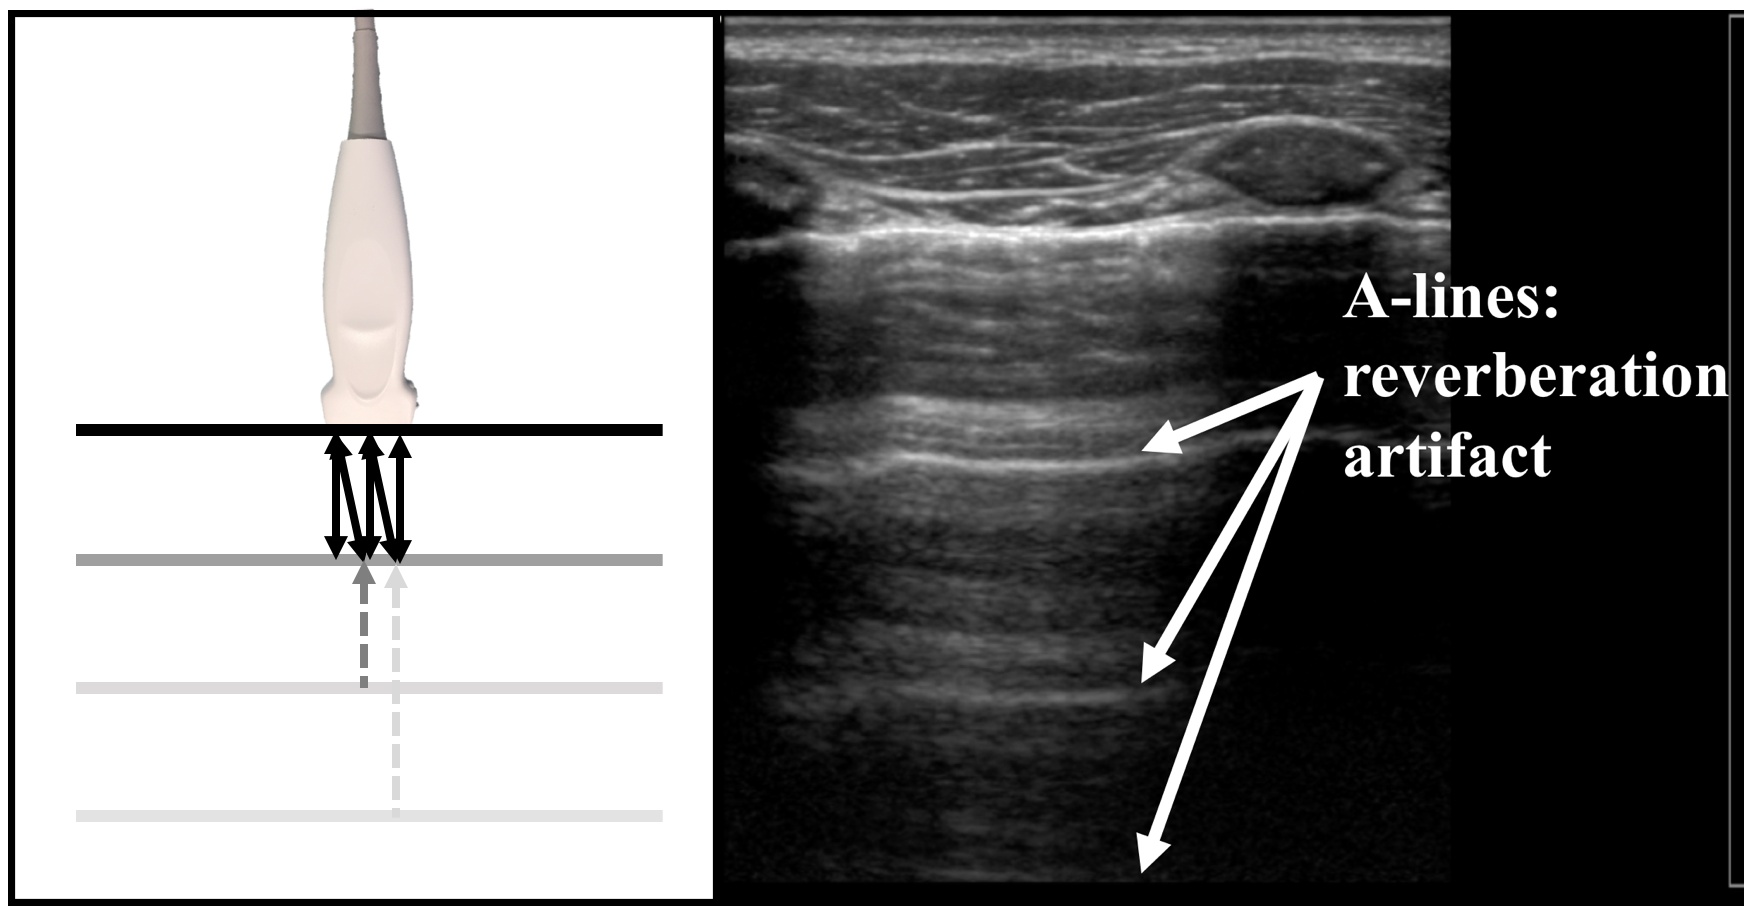 Figure 4: Reverberation artifact
Refraction occurs when the US waves hit the interface of two tissues that transmit the waves at different speeds causing the waves to change direction at an oblique angle. The ultrasound waves are deflected at this interface and, therefore, do not return to the probe causing a dark tail beyond the interface. This is commonly seen at the edge of the bladder (Figure 5).
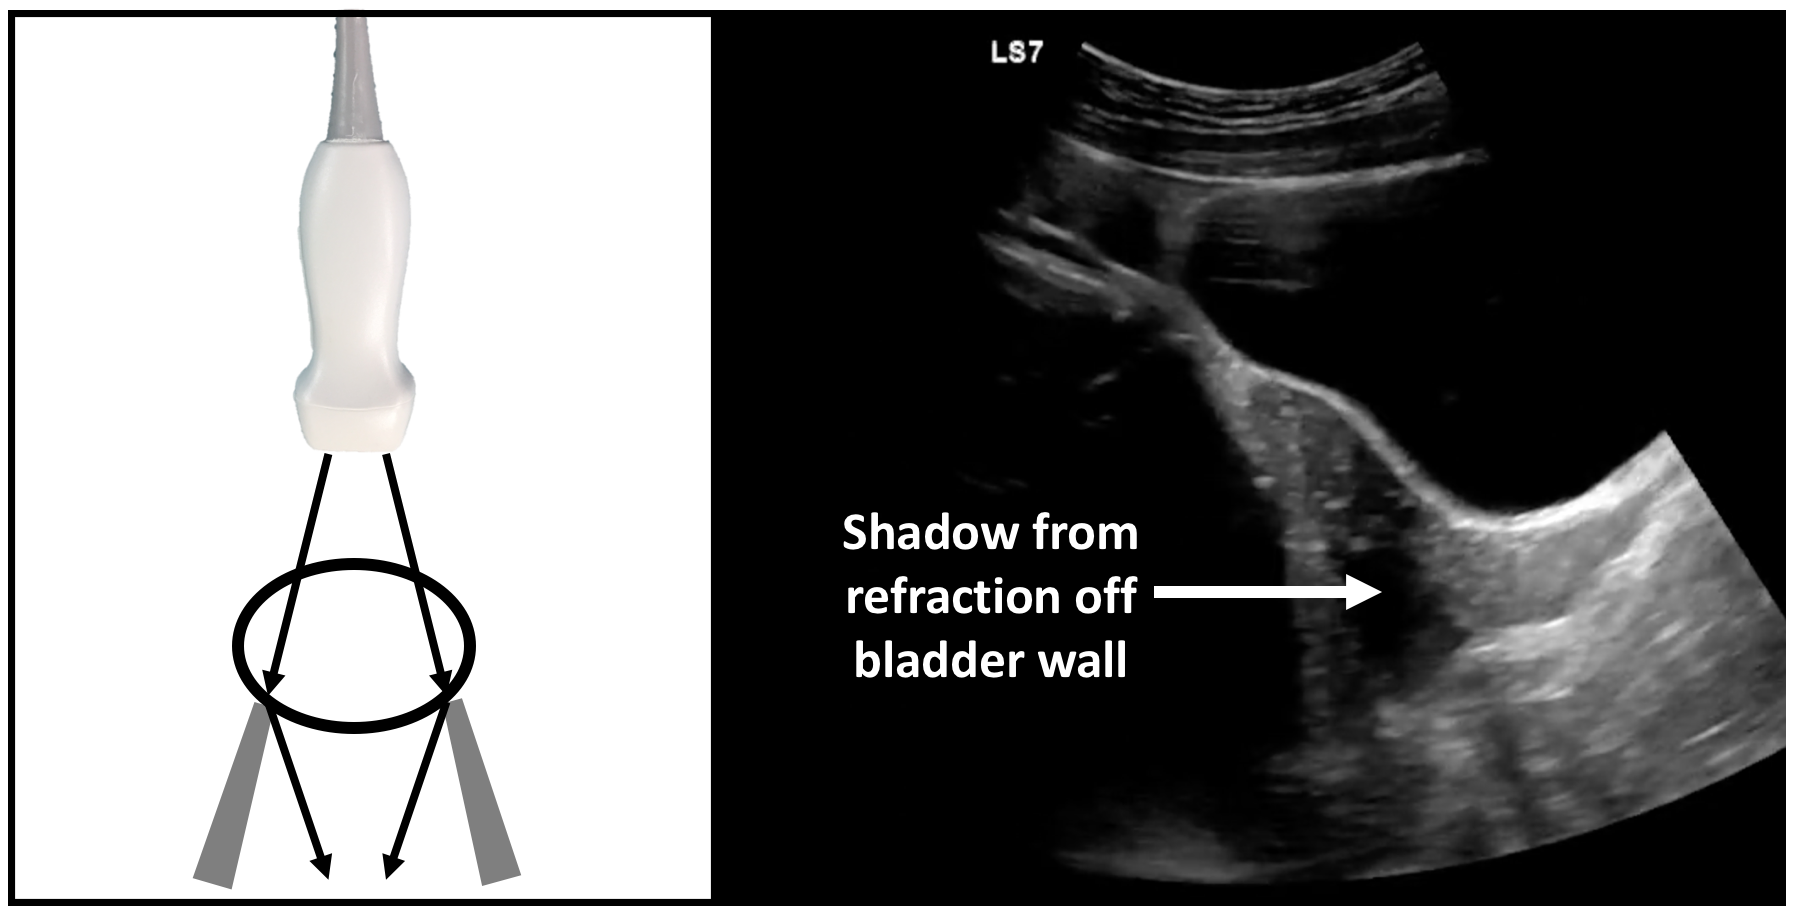 Figure 5: Refraction artifact
Mirroring is an artifact caused by a curved reflector. Outgoing ultrasound waves bounce off the reflector and encounter nearby tissue which in turn reflect these waves back to the curved reflector and ultimately back to the probe. As incoming waves reach the ultrasound probe, the probe cannot discern the path each wave took to reach it, only the time. Waves that take longer to reach the probe are thought to have come from a farther distance. This results in a mirror image of the structure superficial to the structure appearing deep to the reflector. Mirroring artifact is commonly seen at the level of the diaphragm when the liver or spleen’s mirror image is projected in the far-screen above the diagram (Figure 6).
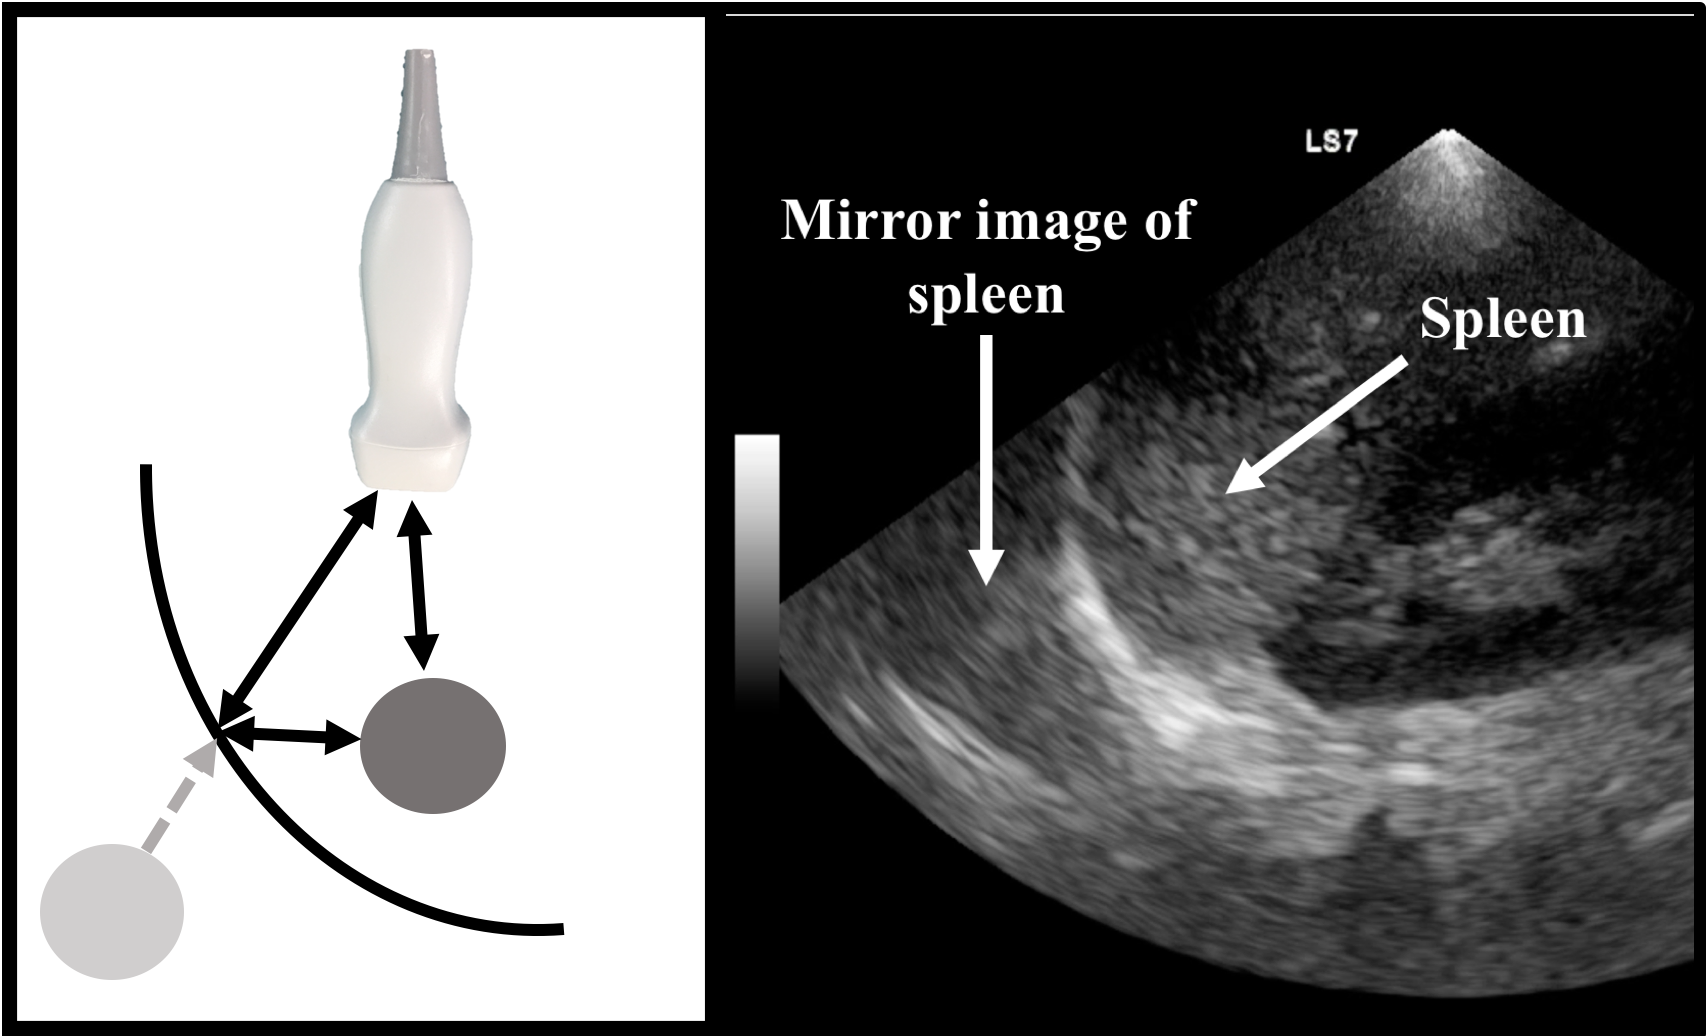 Figure 6: Mirror image artifact
Enhancement is essentially the opposite of shadowing. When ultrasound waves travel through a fluid medium the tissue encountered in the far-field appears brighter than the surrounding tissues. This is because fluids reflect back very little energy. As such the far field tissues are being hit with higher energy waves than the neighboring tissues that are encountering waves which have already lost some degree of energy moving through non-fluid tissues (Figure 7). This enhancement can easily be appreciated when imaging the bladder.
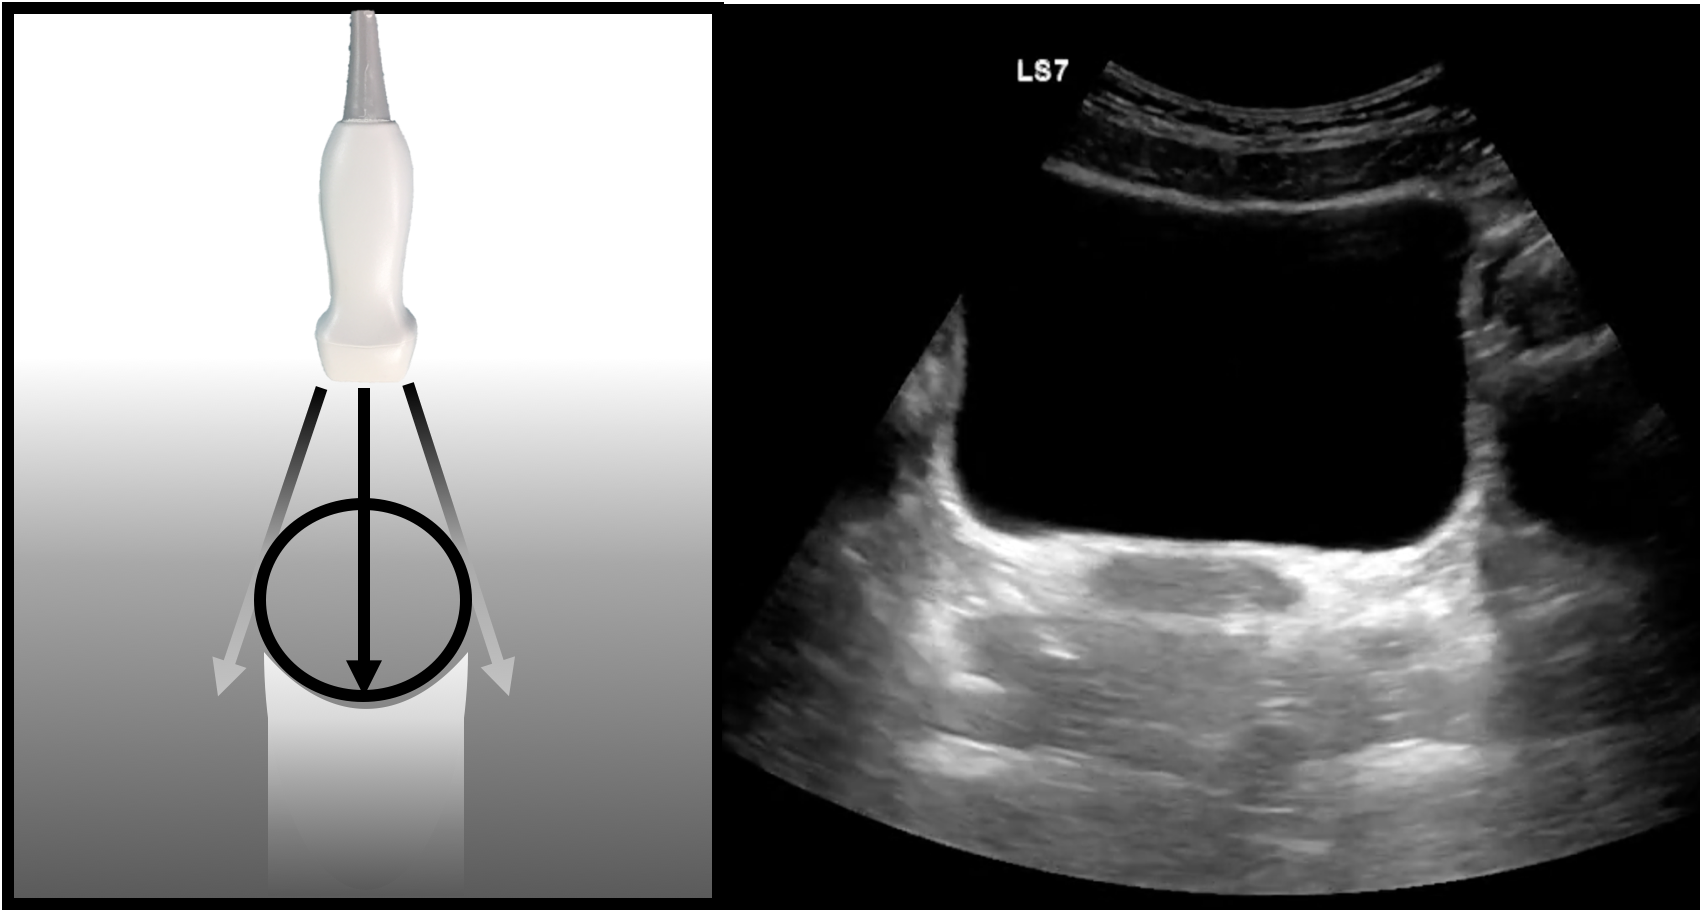 Figure 7: Posterior enhancement artifact
Scatter is encountered when ultrasound waves encounter an air-filled structure. The deflection of the waves in various directions results in a diffuse grey “hazy” appearance (figure 8). This is seen in normal aerated lung, in gas filled bowel, and when air pathologically enters tissues.
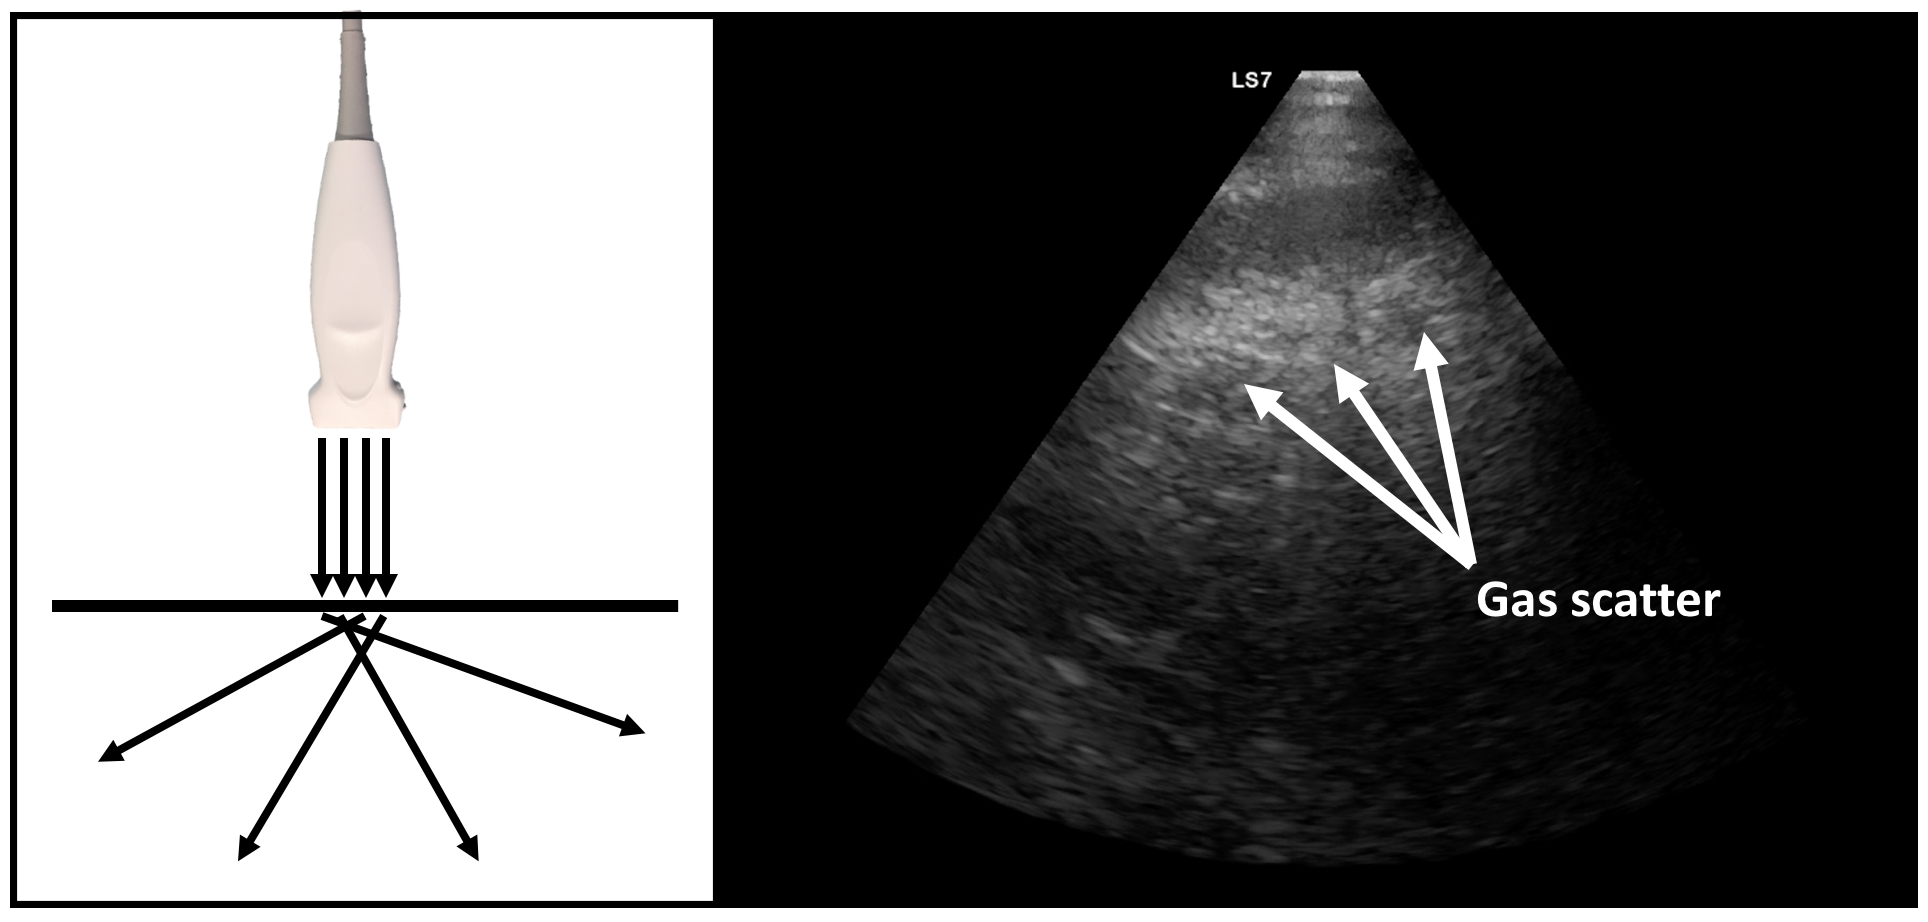 Figure 8: Scatter artifact
Now that we have covered a basic understanding of how ultrasound images are formed we will focus on the basics how they are acquired and interpreted.