Probe selection
The first step in acquiring an ultrasound image is selecting the appropriate probe. As previously mentioned, there are different ultrasound probes that vary both in shape and in the frequency of waves transmitted to tissues. When selecting a transducer keep the size of the patient and location of the area of interest in mind (figure 9).
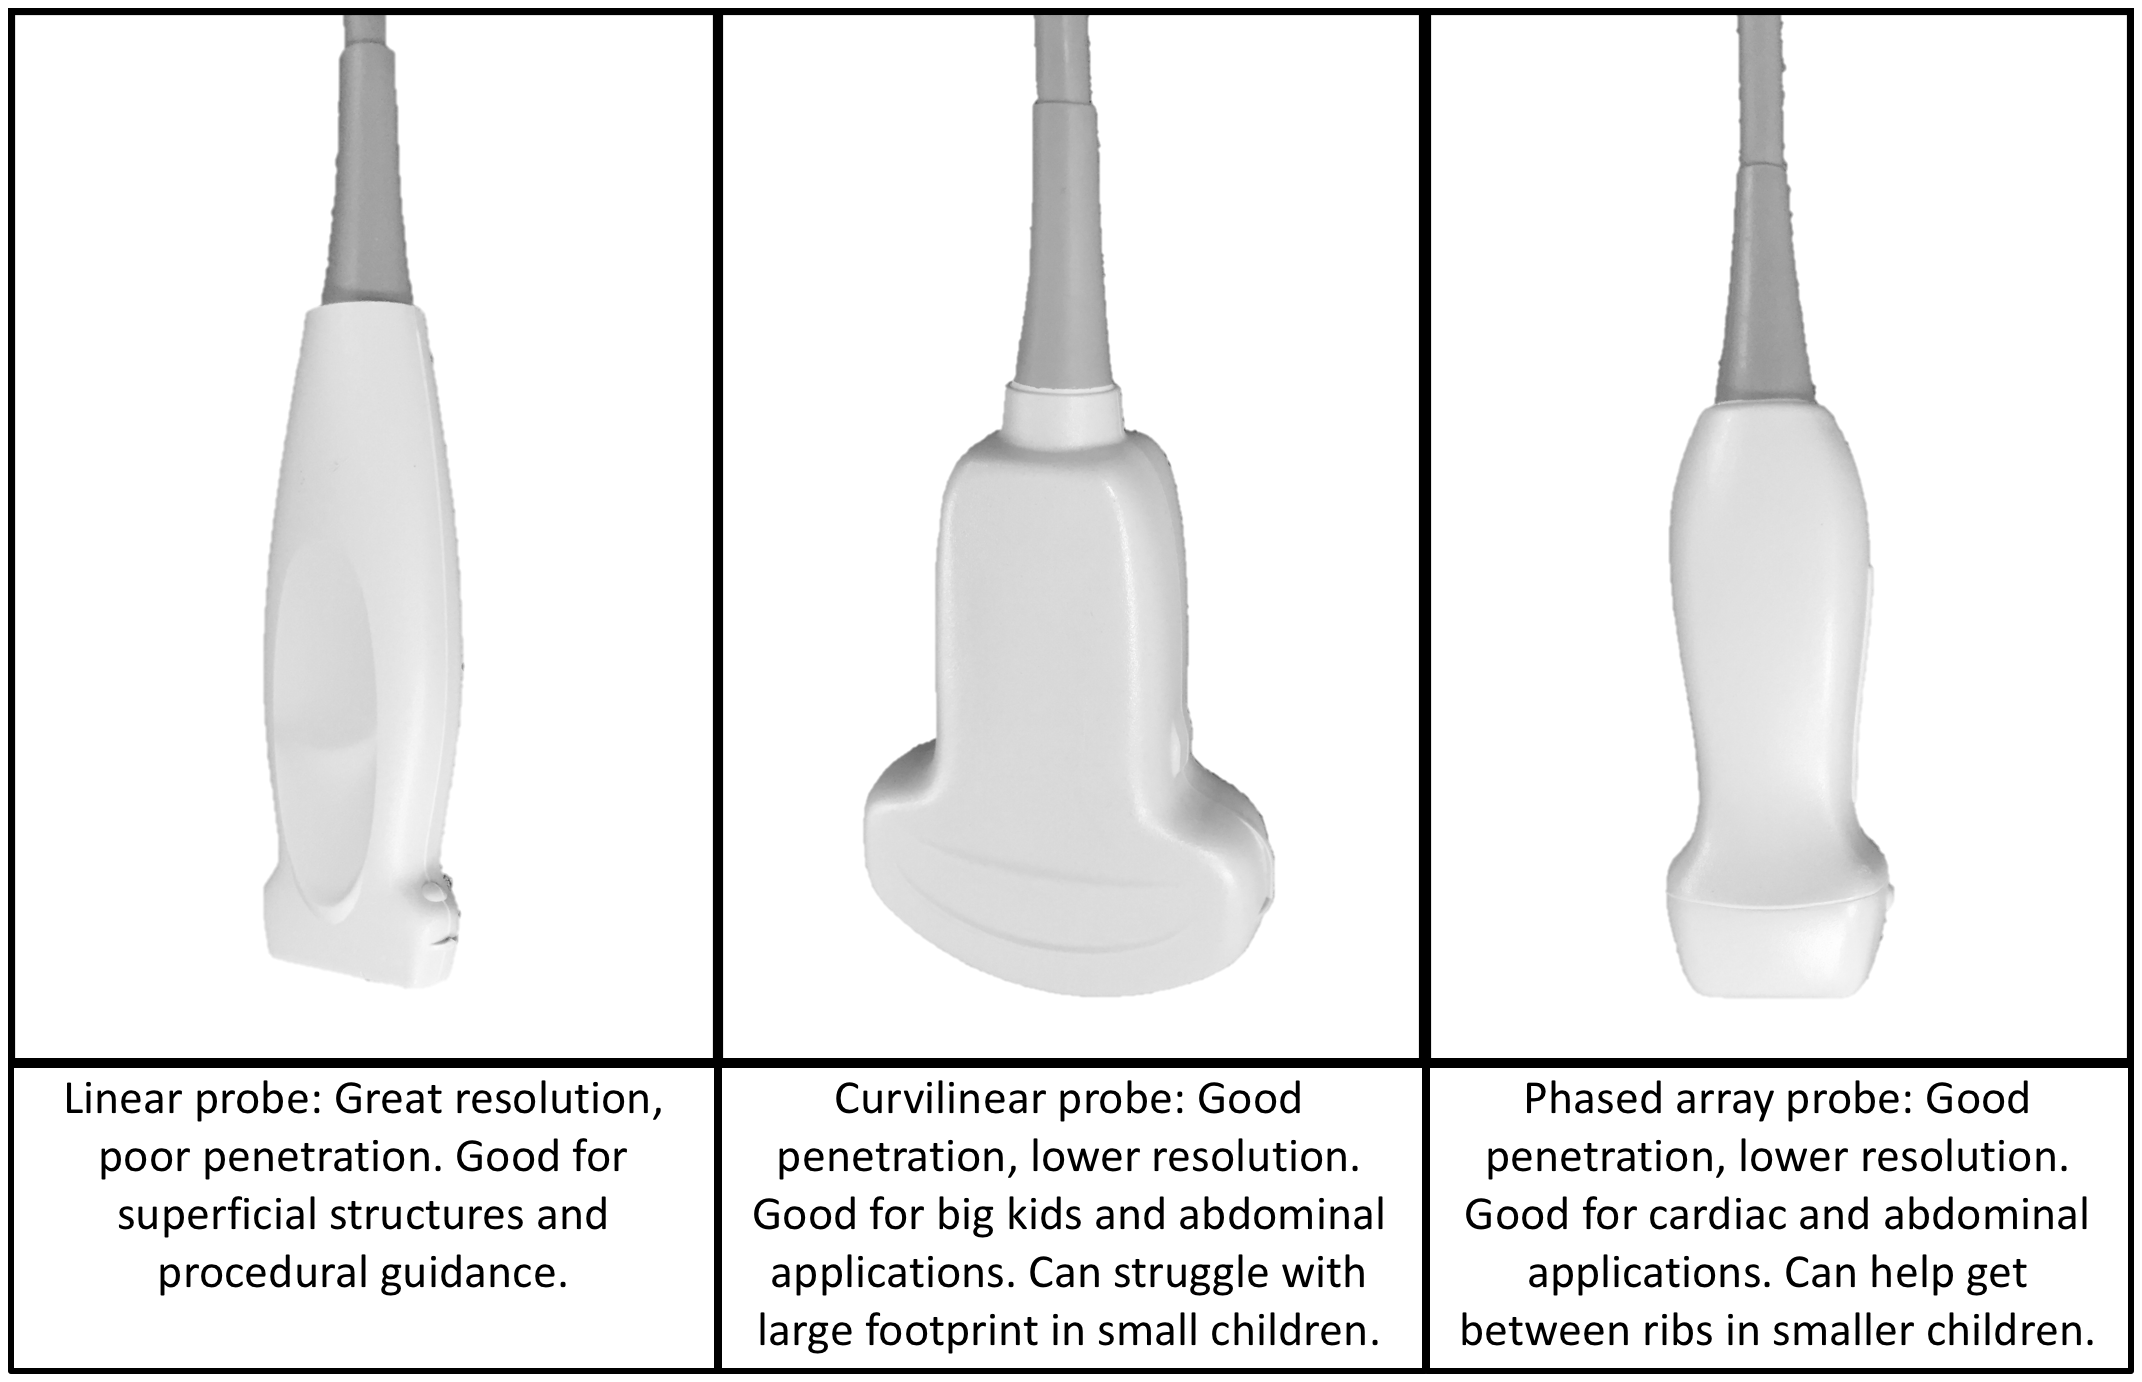 Figure 9: Probe selection
Probe orientation:
After selecting which probe to use the next step is to place the probe correctly on the patient to acquire and interpret images. Every ultrasound probe has an indicator that helps relate the position of the probe on the patient with the image on the screen (Figure 10). By convention the indicator is oriented to either the patient’s right or towards the patient’s head. There is a dot on the ultrasound screen which corresponds to the indicator on the probe. In PoCUS we generally leave this in the top left of the screen.
 Figure 10: Probe marker and screen indicator
The exception to this convention is procedural ultrasound or scans that require approaching from the patient’s posterior. When performing these scans, keep the probe marker to your left. This will make both image generation and procedural movements most intuitive.
Hand Position and Movements
When performing an ultrasound scan hold the distal end of the probe and ensure you anchor your hand on the patient as you scan. To do this use the base of your hand, either the hypothenar eminence or the fourth or fifth digits to steady your hand as well as the probe on the patient (Figure 11).
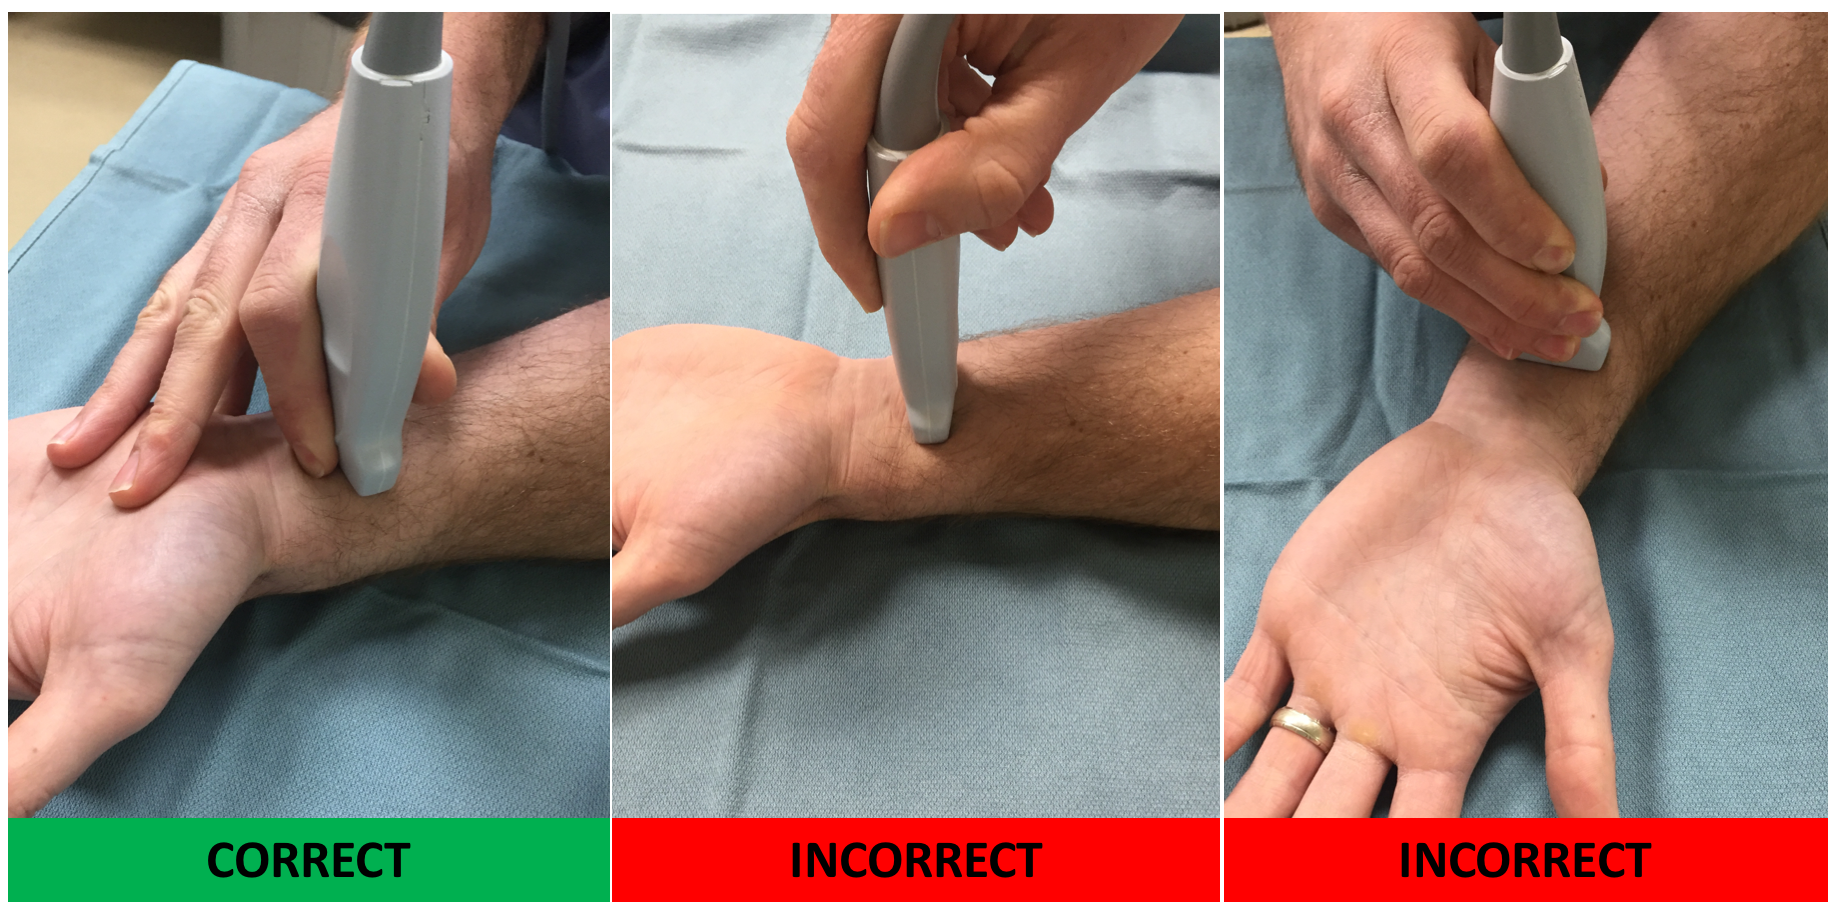 Figure 11: Hand position
Bracing the probe like this will keep your probe from slipping on slick gel and will keep the image steady on a patient who is moving. Certain scans will require specific hand positioning that may make it impossible to hold the probe in this manner. We will discuss these specifically in the relevant modules. Proper hand positioning will allow you to make the fine motor movements required to get the best view of the area you are trying to visualize.
Probe movement requires subtle maneuvers to allow practitioners to make slight adjustments to their image. Large or rapid hand movements will result in scanning through multiple planes quickly, making it difficult to maintain orientation and lead to missing more subtle findings. While moving the probe to adjust and optimize the area of interest we speak of certain cardinal probe movements (Figure 12).
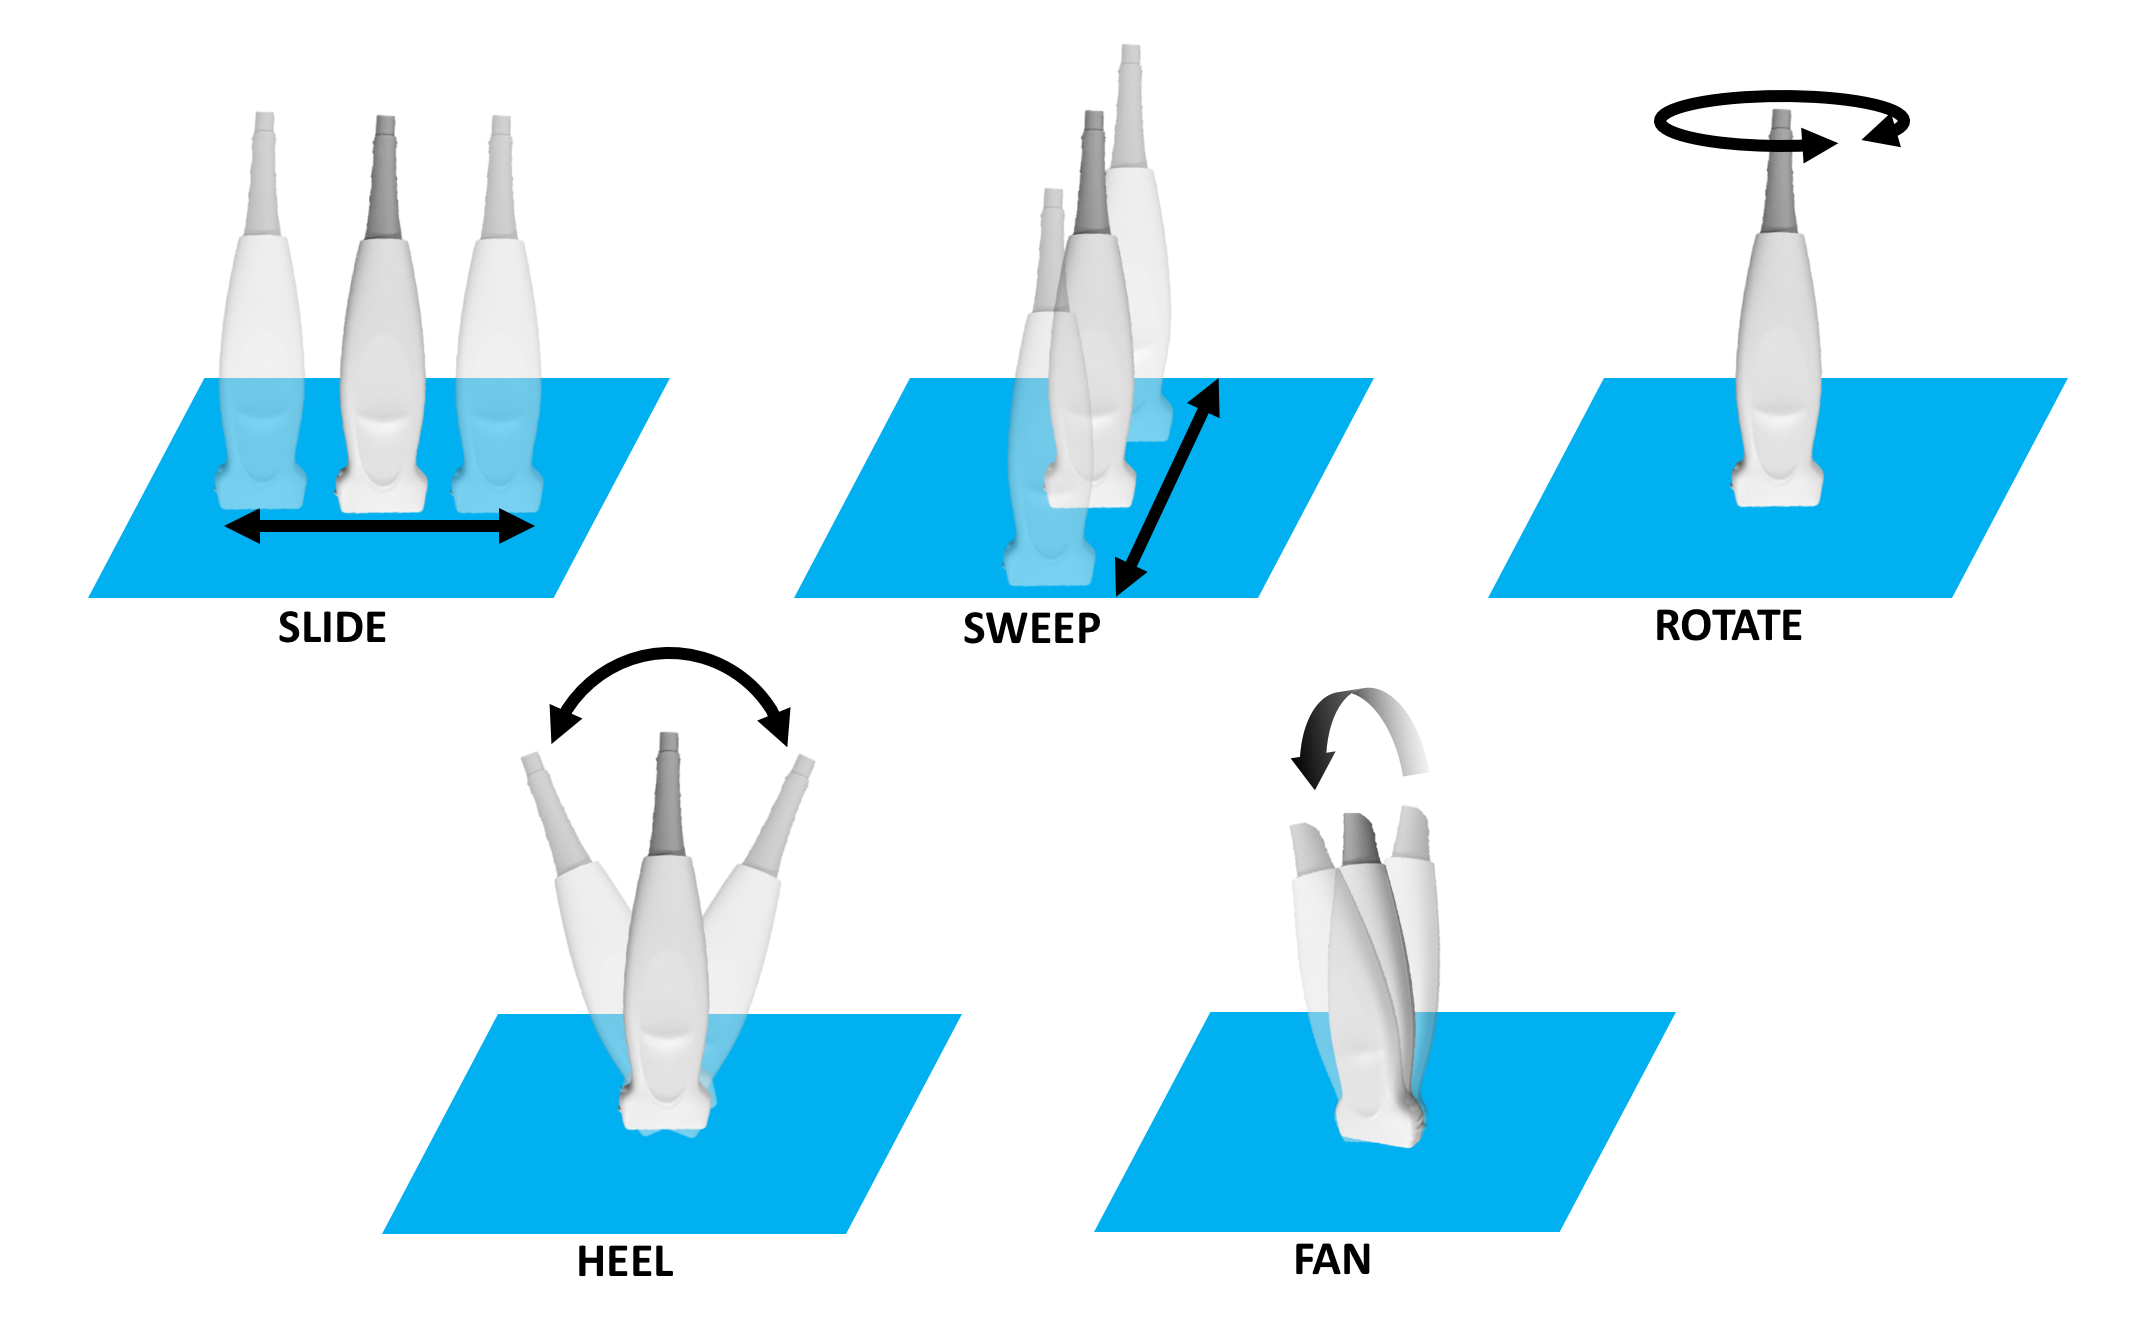 Figure 12: Probe movements
Slide Motion in the long axis of the probe across the body while maintaining contact of the probe to the patient at 90°
Sweep Motion in the short axis of the probe across the body while maintaining contact of the probe to the patient at 90°
Heel Motion in the long axis of the probe along a fixed point on the body while changing the angle of the probe to the patient from 90° to 180/0° in both directions. The body of the probe may make contact with the patient and remains there to generate the image
Fan Motion in the short axis of the probe along a fixed point on the body while changing the angle of the probe to the patient from 90° to 180/ 0° in both directions
Rotate Movement around the compression axis in a clockwise or counterclockwise direction. In other words, changing the probe orientation from transverse to longitudinal and vice-versa.