Position: Sitting position with hip flexion to maximize interspinous space OR lateral recumbent with hip flexion as an alternative
Technique:
1. Gather supplies and prepare ultrasound equipment.
· Preset: Superficial
2. Locate the lumbar spine in transverse plane and systematically map the lumbar spine.
a. Place the probe at the intergluteal cleft (over the midline sacral region) in the transverse position (probe marker towards the child’s left).
b. Slide the probe cranially until you identify the L5 spinous process
c. Continue advancing cranially to visualize L4, L3, L2… using the spinous processes as reference.
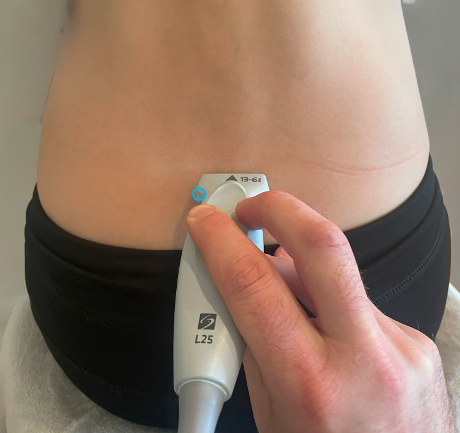 Figure 17. Transverse probe placement over the spine
3. Mark Midline on the skin
a. Center the most visualized spinous processes and mark dot on the skin over each spinous process (e.g. L2, L3, L4, L5).
b. Connect these dots with a vertical line. This will be your approximate midline axis.
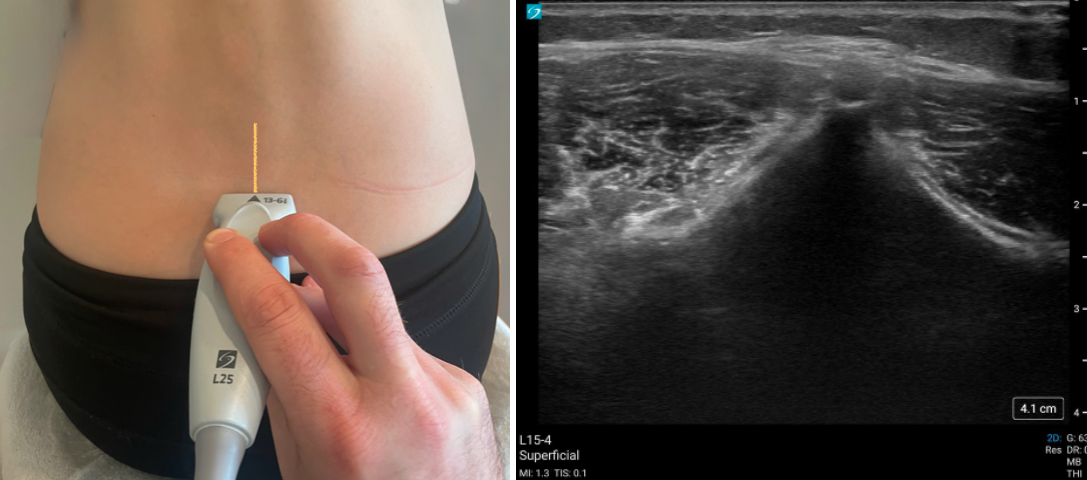
Figure 18. Landmarking on the skin from the transverse probe position (left) with corresponding PoCUS image of the transverse spine (right).
4. Identify interspinous spaces
a. Place the linear probe in the longitudinal orientation (probe marker pointed cranially) along the midline line.
b. Seek the interspinous spaces.
c. Center these gaps on the screen, and mark horizontal lines on the skin at each of the gap levels.

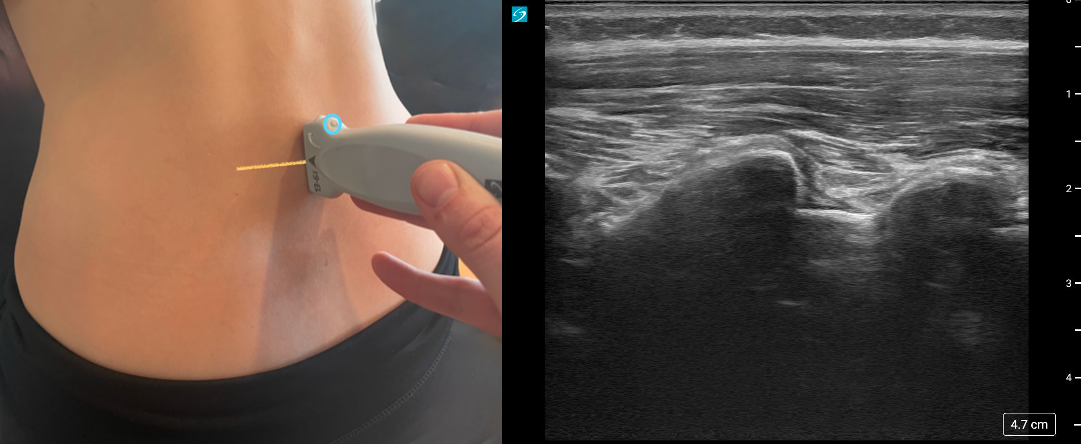 Figure 19. Landmarking on the skin from the sagittal probe position (left) with corresponding PoCUS image of the sagittal spine (right).
5. Estimate depth to ligamentum flavum / posterior dura
a. In the longitudinal plane, move the probe slightly lateral to be in an off-midline view and angle the probe medially (figure 20).
b. Identify the ligamentum flavum (older children).
c. Identify the posterior dura, which will be a few millimeters deeper to the ligamentum.
d. Look at the depth of the dura and use this as a rough guide to how deep the needle must pass to reach the subarachnoid space.
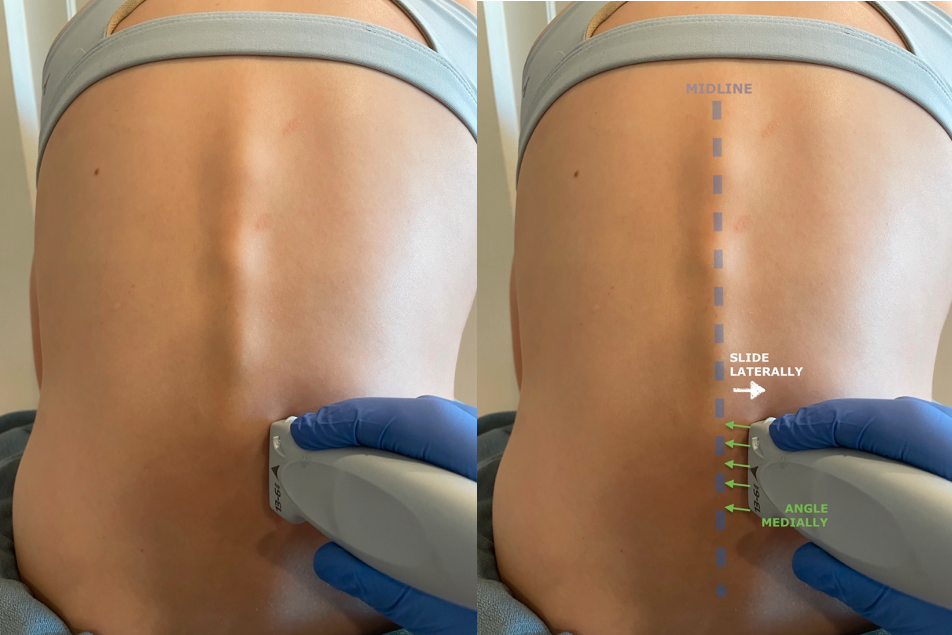 Figure 20. Longitudinal off-midline view probe position
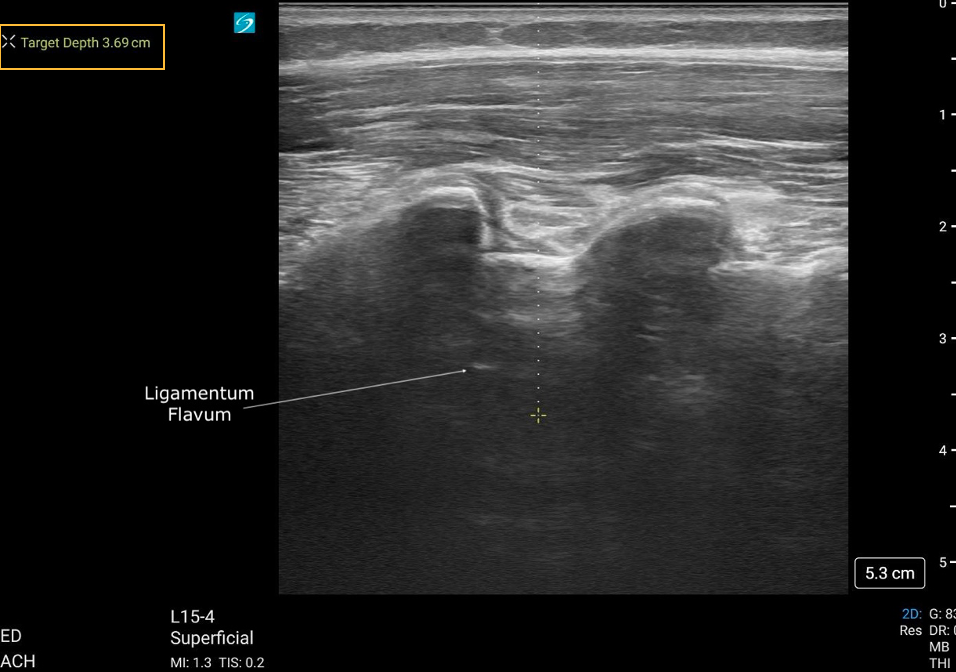 Figure 21. Caliper placement for measuring the depth to the dura to estimate depth of needle insertion, from the sagittal plane.
6. Determine final insertion point(s): The intersection of the vertical midline line and the horizontal line at the chosen interspinous gap is your ideal needle insertion site.
 Figure 22. Final landmarking on the skin with the intersection indicating needle insertion site.
7. After landmarking, proceed using your institution’s standard sterile technique and needle insertion protocol. Be mindful that the actual patient position should remain unchanged from the time of ultrasound marking.