Technique

Patient Positioning

  1. Place the patient in supine position and expose the groin.
  2. Externally rotate and slightly abduct the hip (if the patient will tolerate).
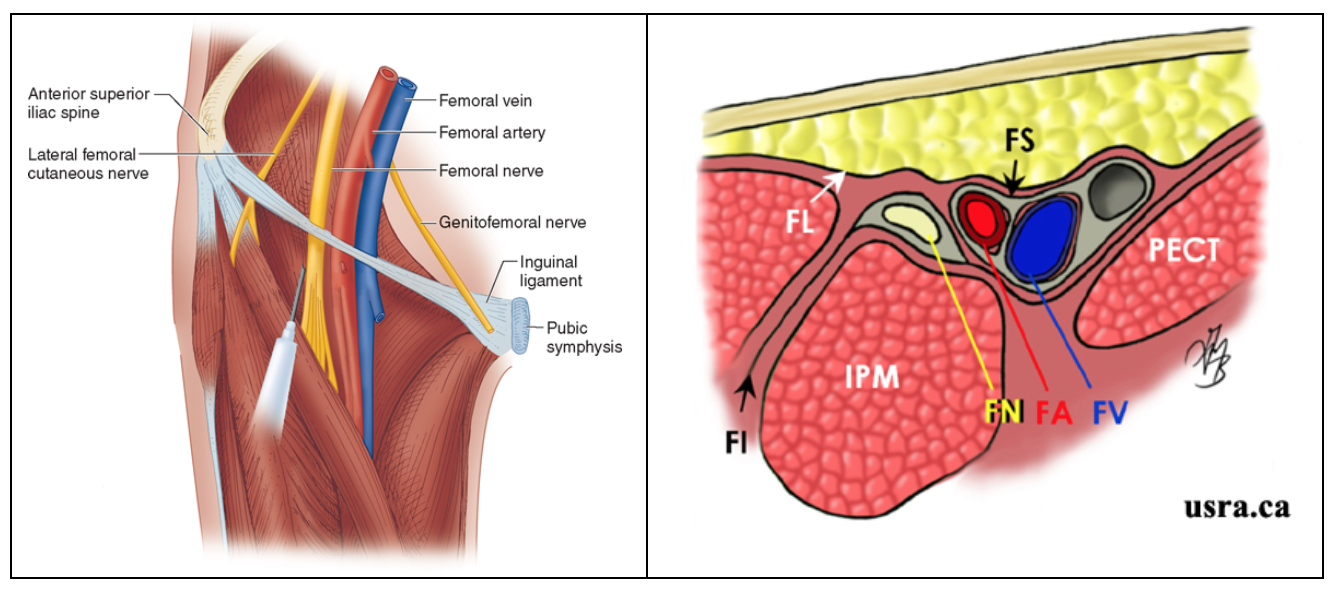
  3. Palpate mark the anterior superior iliac spine (ASIS) and pubic symphysis (PS).
  4. Palpate mark the inguinal crease (the line between the ASIS and PS).
  5. Palpate mark the femoral artery (it should lie 1-2 cm beneath the inguinal ligament).
  6. If desired, identify sonographic landmarks prior to preparing sterile field


Ultrasound Machine Preparation

  1. Ensure the ultrasound screen is positioned in order to be clearly seen.
  2. Select the high-frequency linear ultrasound probe.
  3. Choose a nerve pre-set (e.g., compound or tissue harmonic imaging enabled) and needle enhancement pre-set if available
  4. Select depth of field and place the femoral nerve in the center of the screen.
  5. Focus gain to clearly visualize the femoral nerve and its surrounding structures.


Create a Sterile Field

  1. Prep the skin and prepare a sterile field
  2. Prepare the US with a sterile transducer cover


Stepwise Approach to Sonographic Identification

  1. Place the probe on the patient’s groin in the transverse plane (figure 7).
  2. Ensure the probe marker is oriented towards the patient’s right.
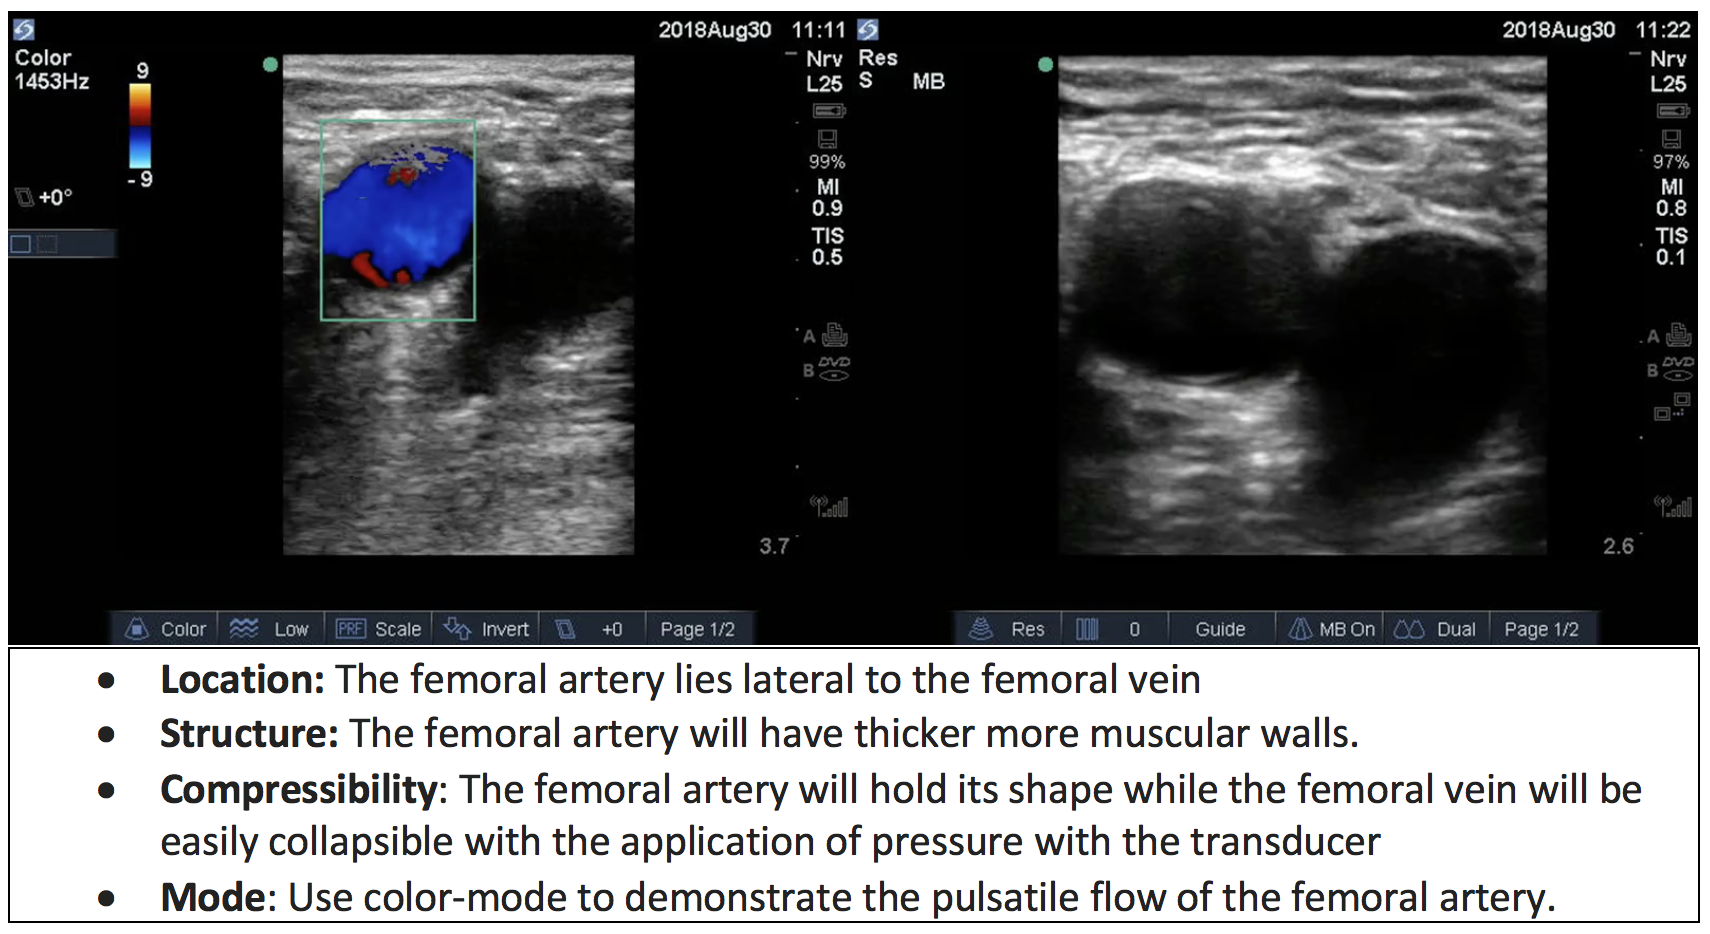
  3. Identify the circular structure of the femoral artery in transverse axis.
  4. Identify the femoral vein which will lie medial to the femoral artery. Note: If you are seeing three vascular structures in your frame of view, simply slide your probe more proximally (cephalad) towards the inguinal crease as you have likely placed your probe too low and are below the level where the femoral artery trifurcates into the profunda femoris, the medial curcumflex femoris and the superficial femoral arteries
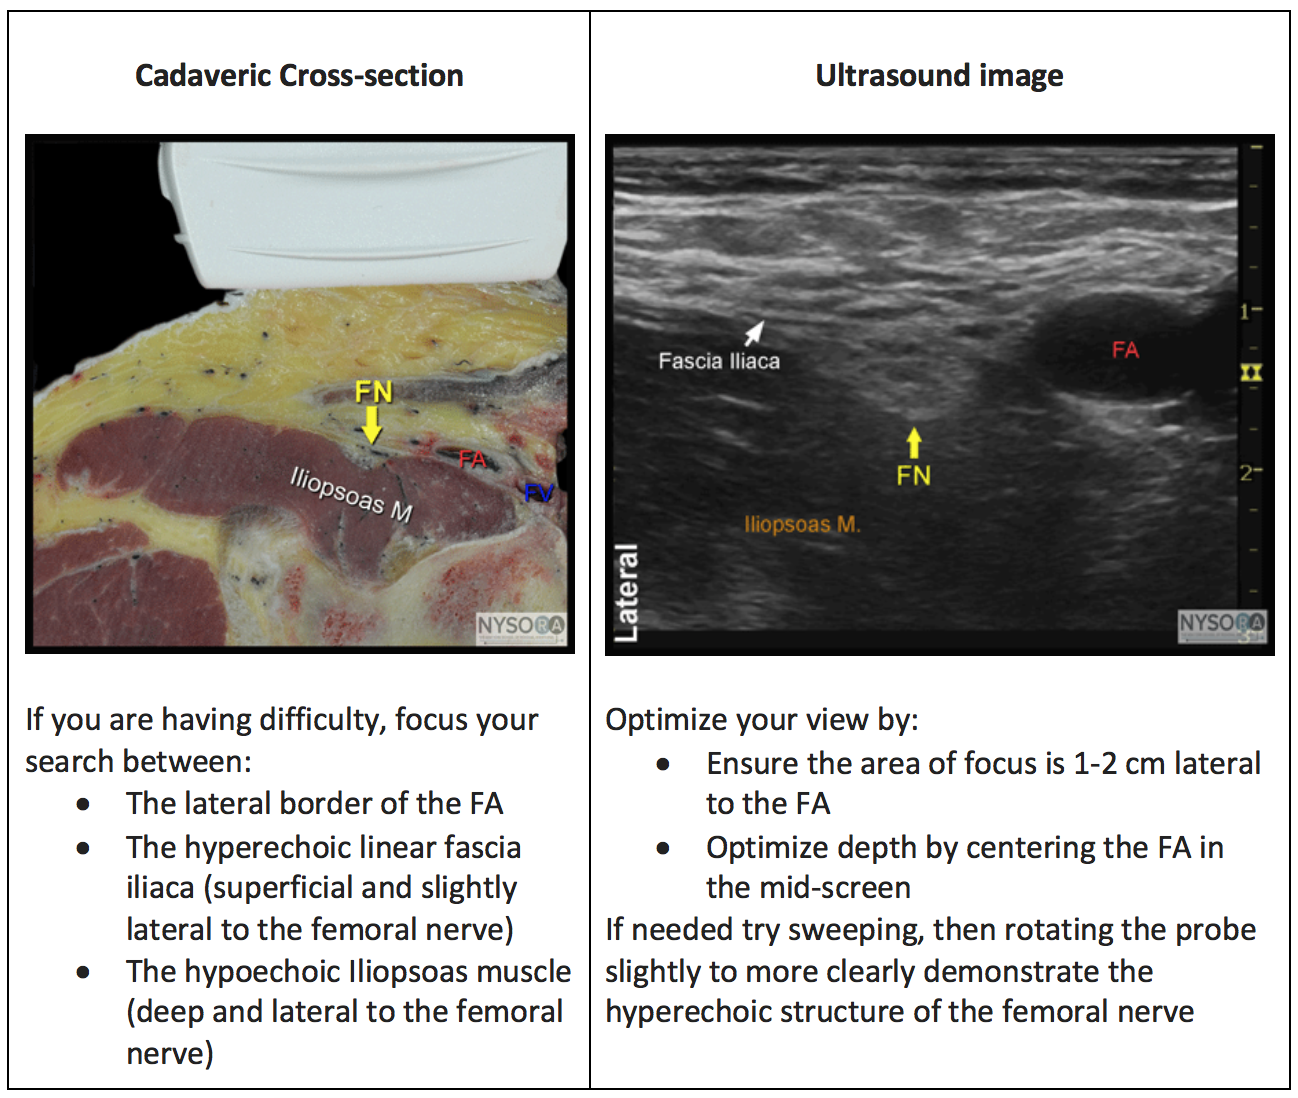
  5. Identify the femoral nerve. It will appear as an echogenic structure (often circular, flat or triangular) which will lie 1-2 cm lateral to the femoral artery. It will appear immediately superior to the hypoechoic iliopsoas muscle.
  6. Identify the fascia iliaca. It will appear as a faint linear hyperechoic structure which will be superficial to the femoral nerve and will be deep to the fascia lata. In order to provide a satisfactory femoral nerve block, the needle tip will need to pierce the fascia iliaca and inject the local anesthetic in a circumferential manner around the femoral nerve.


Needling Approach

There are two approaches that you may use for needle insertion. For the purpose of this module we will describe the in-plane approach given that without the use of an echogenic needle, it is difficult to accurately visualize the needle tip using the out-of-plane approach (figure 7).


Figure 7: In-plane technique

  1. Ensure the probe is in the transverse plane with the probe marker to patient’s right.
  2. Ensure the femoral nerve is directly in the center of the screen (as outlined above).
  3. Raise a superficial weal (1-2 cc) of local anesthetic at the site of needle insertion.
  4. Insert the needle into the skin with the needle tip centered on the probe and with the direction of needle insertion parallel to the probe. Note that the more acute the angle of approach in relation to the skin, the more easily the needle will be visualized on ultrasound (figure 11).
  5. As you advance the needle, note the angle and depth of approach of the screen.
  6. Maintain the needle shaft directly in plane with the ultrasound beam.
  7. Advance the needle towards the femoral nerve (the goal is to direct the needle tip to be immediately lateral or superior to the nerve and deep to the fascia iliaca) (figure 8).


Figure 8: Needle placement


With the in-plane technique both the needle shaft and tip should be directly visualized along their full length as the needle is advanced towards the femoral nerve. It is particularly important to identify the needle tip as it can easily fall out of the field of view of the thin ultrasound beam leading to incorrect placement of local anesthetic.


Techniques to aid needle tip visualization:

  • If the needle is not seen in the US field, try to sweep or fan the probe to identify both the needle and the area of interest into view
  • If only a portion of the needle is seen, try rotating the probe to bring the full course of the needle into view
  • If probe manipulation is unsuccessful you can use hydro-localization to help identify the needle, and its tip more clearly (figure 9).


Figure 9: Hydro-localization

If probe manipulation has been unsuccessful in locating the needle tip, hydro-localization can be used instead. To do this, you simply inject a small (1-3 cc) amount of D5W into the field and the hypoechoic fluid should help locate your needle tip.

Do NOT use local anesthetic for hydro-localization without first attempting to withdraw on the syringe to prevent intravascular injection.


Ultrasound Confirmation of Injection: What is normal?

  1. Prior to injection of any local anesthetic agent, ensure that you are confident that the needle tip is positioned just lateral to the femoral nerve with the tip directed so that the injected anesthetic will be directed underneath the femoral nerve (the injection of local anesthetic beneath the femoral nerve will improve the echogenicity of the nerve and aid with further visualization).
  2. Once you are satisfied with your needle tip location and have aspirated to ensure that the needle tip is not in a vessel, inject a small volume of the local anesthetic.
  3. As you are injecting, you may see distension of the femoral nerve sheath (figure 10).
  4. You may need to re-position the needle tip in order to direct the local anesthetic circumferentially around the femoral nerve. This circumferential injection of local anesthetic hastens block onset.

Note: If you encounter resistance to injection of local anesthetic, stop injecting immediately and withdraw your needle due to the possibility of intra-neuronal injection.

Figure 10: Femoral nerve sheath distension following local anesthetic injection.